CHAIN COMPATIBILITY (PART 1)
The first part of this article will review the basics of bicycle chain compatibility to help you know how to choose the right chain for your bike. The second part of this article will cover the various tools and methods for determining when to replace a bicycle chain.
PRELIMINARY INFO
Bicycle chains are made of multiple pairs of steel outer plates and inner plates held together by rivets. A roller separates each pair of inner plates. The rivet (pin) is pressed tightly through both outer plates. The rivet then pivots freely on the inner plates and roller.
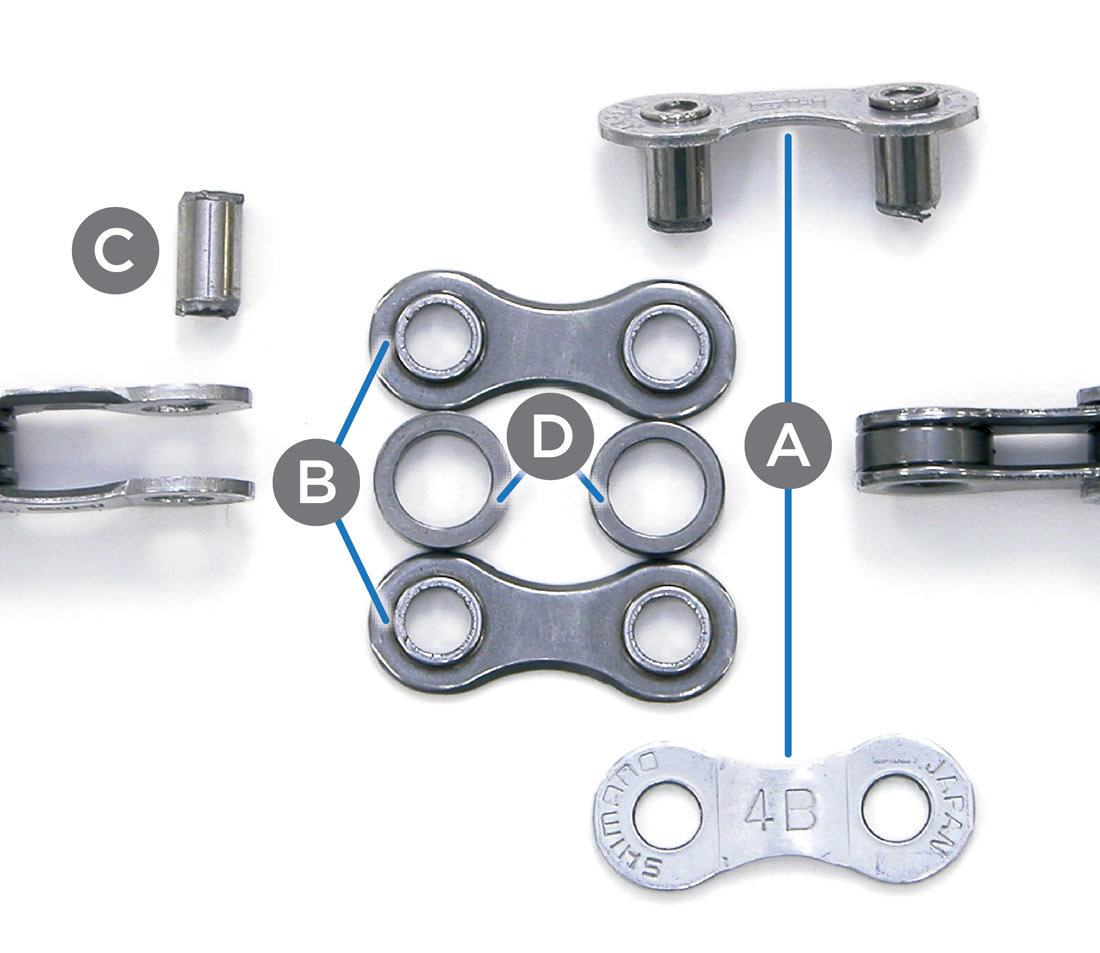
A: Side plates
B: Inner plates
C: Rivet
D: Rollers
All modern bicycle chains are made to the “one-half inch pitch” standard, meaning from rivet to rivet is nominally 0.5 inches. The sprocket teeth are cut for this same one-half inch standard to accept bicycle chains. However, this does not mean all makes and models of chains are interchangeable.
There are two basic types of bicycle chains: “one-speed” chains, and derailleur chains.
ONE-SPEED CHAINS
The common one-speed chain is designed for bikes with one sprocket on the crankset and second sprocket on the wheel. The width of the roller is nominally 1/8″ wide (3.3mm). The one-speed chains are not designed shift on the multiple rear cog sets of derailleur bikes.
There are rear hubs with multiple internally geared speeds, but the chain is still commonly called a “one-speed” chain. They are also referred to as “eighth-inch chain.” The 1/8″ chain will measure approximately 9mm across the rivet.
Some freestyle bikes use a wider sprocket and a wider 3/16″ one-speed chain. The idea is that this wider chain provides longer chain life for the purpose “grinding,” which is sliding down a rail or other long fixture on the chain.
DERAILLEUR CHAINS
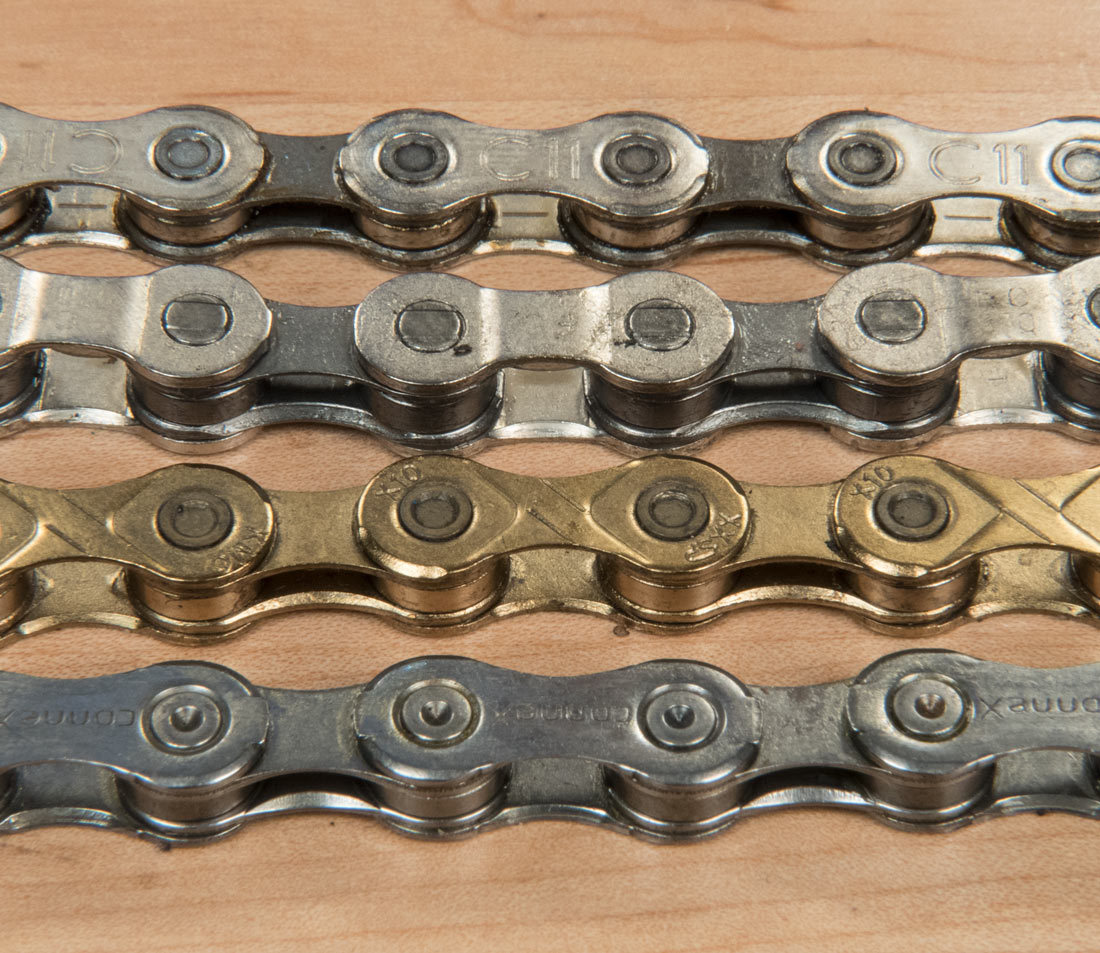
Derailleur bike chains are designed to be moved from sprocket to sprocket, and come in many different design standards. When selecting a chain, the first consideration is the number of rear sprockets. The rear cog sets have been made with 5, 6, 7, 8, 9, 10, 11, or 12 sprockets. As the number of cogs on the rear hub increases, the spacing between cogs tends to be reduced. Consequently, chains tend to get narrower as the number of rear cogs increases.
Nominally derailleur chains are called “3/32-inch chain.” However that is not a true measurement, as modern derailleur chains can vary from that sizing.
Some nominal widths measured across the rivet between chains are:
- 12 rear cogs — 5.3 mm
- 11 rear cogs — 5.5 mm
- 10 rear cogs — 6 mm
- 9 rear cogs — 6.5 to 7 mm
- 6, 7, and 8 rear cogs — 7 mm
In addition to the chain working on the rear cogs and rear derailleur the chain must be compatible with the front chain rings. Front cranksets are also designated for varying “speeds” to give an indication of the right width chain to use. The spacing between front rings for a 8 or 9 speed chainring set will be relatively wide. Use the narrow 10 or 11 speed chain may result in the tendency for it to fall between the two rings during a shift.
Drivetrain manufacturers design their chains to work as a system with the derailleurs, rear sprockets, and shift levers. Chains can vary in side plate shape, sizing, and height. Differences can cause variations in shifting performance between brands and models.
Additionally, chains will vary in the quality of steel used. Better chains that are more durable and longer lasting tend to have harder rivets. Riding a bike tends to wear and thin the rivet as it is pulled against the inner plates.
FINAL NOTES
When in doubt about chain selection, it is usually best to stick the the drivetrain manufacturers chains. It does get more complex when components become mixed. For example, a bike may have a SRAM® chain but Shimano® derailleurs, a Sun Race® cassette, and MicroShift® shifters. Some chains can be used between different brands. Consult a professional mechanic for recommendations. There are certainly times that chain selection is an “educated guess.”
WHEN TO REPLACE A WORN CHAIN (PART 2)
Knowing when to replace your chain is an important aspect of bicycle maintenance that can help extend the life of components and maintain optimal drivetrain performance.
PRELIMINARY INFO (PART 2)
Chains are a consumable part of the bicycle drive train. As you pile on the miles, your bike’s chain will wear out. The internal parts of the chain, the rivets and rollers, begin to wear out and give the illusion of stretching. This wear can cause the chain to mesh poorly with cogs and chainrings, causing poor shifting, premature wear to the cogs and even skipping over the cogs. Since it’s far more expensive to replace your cassette than it is to replace a chain, knowing when to replace your chain can actually save you some money in the long run.
There are different methods for measuring chain wear from simply lifting the chain off of the front chainrings to measuring the distance between two rivets on your chain. But the easiest and most accurate way to determine chain wear is by using a tool such as the CC-3.2 Chain Checker or the CC-2 Chain Checker.
You may either place your bike in a repair stand or leave it on the ground as long as it remains stable and will not shift or tip over.2
METHOD 1: LIFT OFF CHAINRING
The first method for checking chain wear is to simply lift the chain off the front chainring. Shift into the smallest cog on the rear and largest chainring in front and lift the chain off of the chainring.
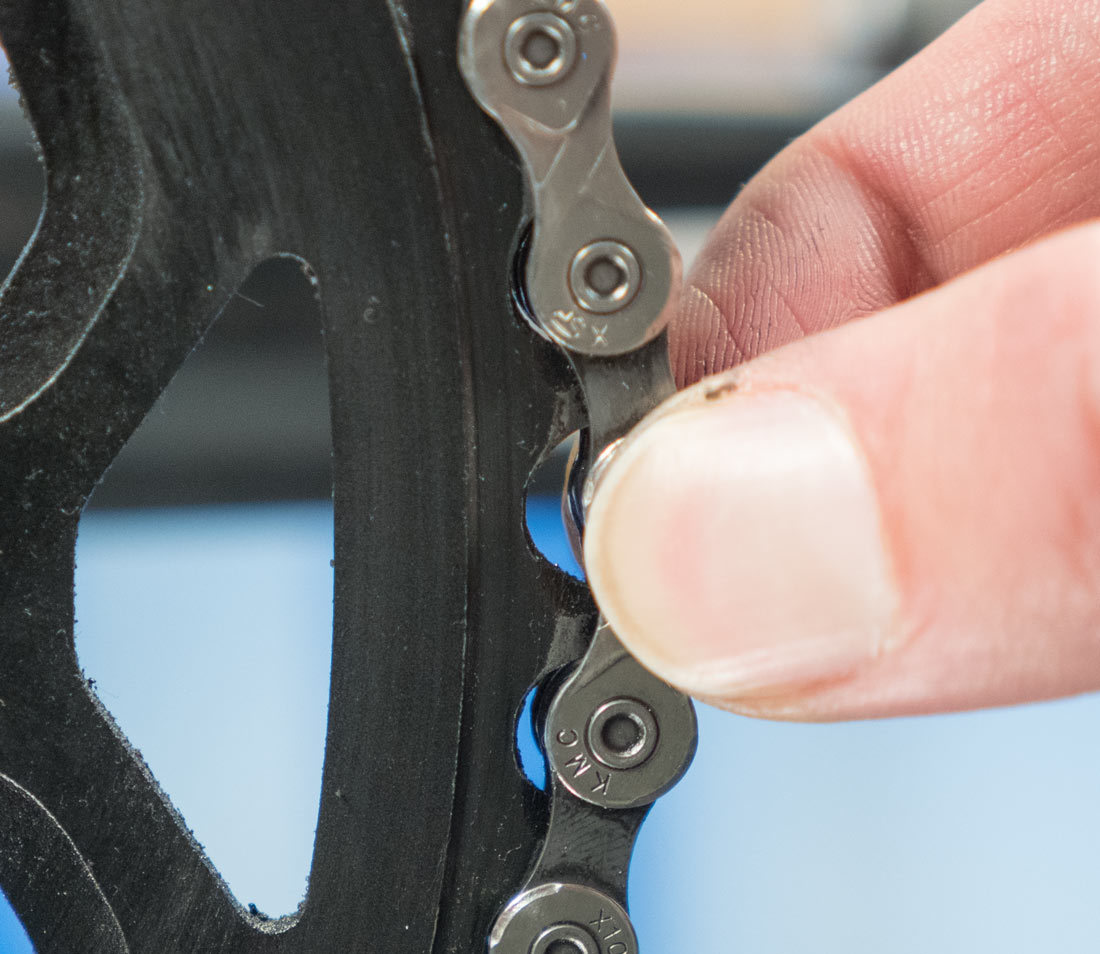
If it lifts off the chainring to the point where you can see a lot of daylight between your chain and chainrings, you’ll either need to replace your chain, or you are fast approaching the point of replacement. It’s nearly as accurate as using the proper tool, but it’s a good starting point if you haven’t replaced your chain in a while.3
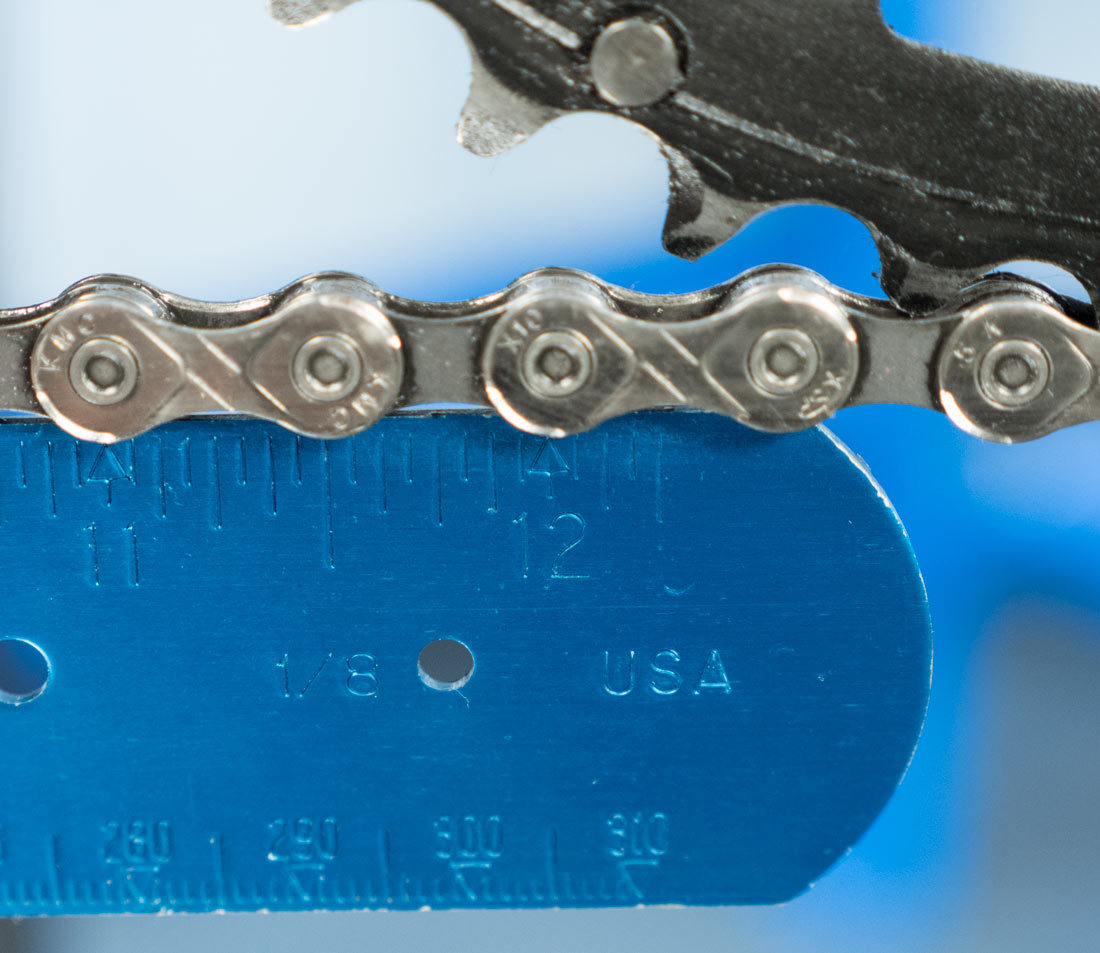
METHOD 2: MEASURE WITH RULER
Another ballpark method for checking chain wear is by measuring it with a ruler. Pick a rivet and line it up at the zero mark. Count 23 more rivets and your last rivet should be at the 12” mark of your ruler. If it is off by more than 1/16” your chain is stretched to the point of replacement.